
Carbon Brush For Power Tools: The Complete Practical Guide to Diagnosis, Selection, and Replacement
If your electric drill, angle grinder, or circular saw suddenly feels weak, struggles under load, or even throws off alarming sparks—don't rush to buy a new tool. The problem is very likely a tiny, inexpensive component: the Carbon Brush For Power Tools.
As an essential consumable in electric motors, the carbon brush transfers electrical current from the stationary part of the motor to the rotating commutator. Friction means wear, and when it wears down, your tool stops performing. Learning to inspect and replace this part yourself can save you significant repair costs and breathe new life into your trusted equipment.
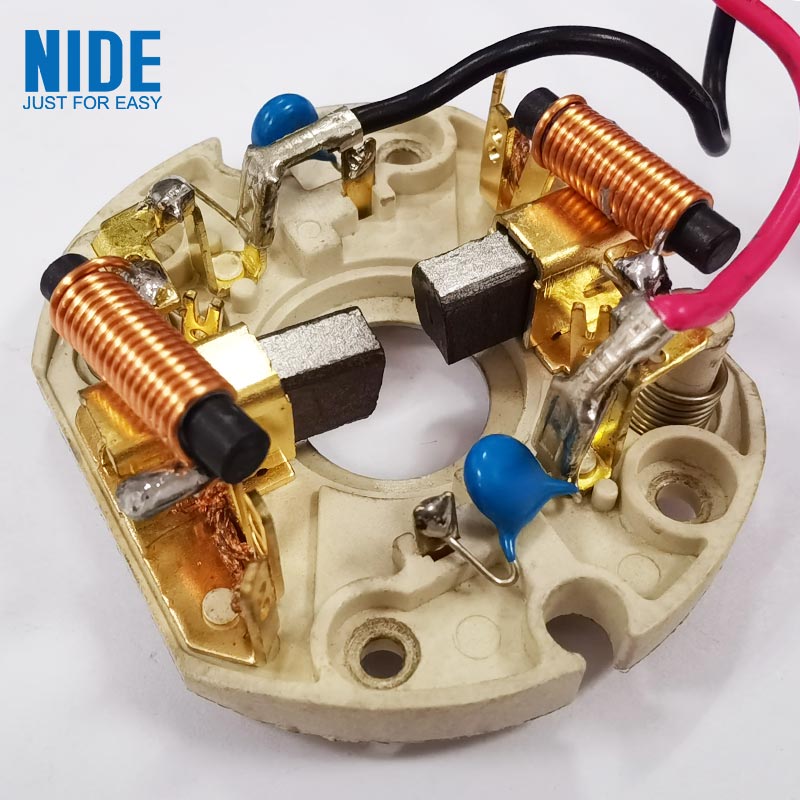
When to Replace – The "Three-Signal" Diagnostic Method
Don't wait until the tool stops spinning entirely. Watch for these three warning signs:
| Signal | What You'll Notice | What It Means |
|---|---|---|
| Performance Drop | Sluggish speed, lack of torque when drilling or cutting, or even stalling under load. | Poor contact between the brush and commutator is restricting current flow. |
| Excessive Sparking | Visible ring-shaped blue sparks through the ventilation slots (minor sparks are normal). | Severe brush wear or insufficient spring pressure. Requires immediate attention. |
| Scheduled Inspection | If you're a heavy user (daily continuous operation), open the brush caps every 2–3 months for a visual check—even if the tool seems fine. | Prevention is better than repair. |
Precise Selection – Getting the Right Match Matters More Than You Think
A similar-looking brush is not necessarily a compatible one. A 1mm difference in size means it won't fit. The wrong material can burn out your motor. When purchasing a Carbon Brush For Power Tools, focus on these two points:
1. Match the Model Number
The safest approach: check the number on your old carbon brush, or consult the parts list in your tool's manual. Major brands like Bosch, Makita, and DeWalt have dedicated part numbers. For instance, Makita explicitly states in their manuals: "Use only the same type of carbon brush."
2. Match the Physical Dimensions and Shape
Brushes come in various configurations: with attached springs, with metal holders, or as plain carbon blocks. This depends on your motor design. If you can't find a part number, bring the old one and measure:
Length, width, and height (in millimeters)Shape (flat face vs. angled face)
Spring type (coil or leaf)
Critical Note: Different materials (carbon-graphite vs. electrographite) have varying conductivity and wear resistance. Using the wrong grade can score and damage the commutator ("copper head"). Stick with genuine OEM or reputable aftermarket equivalents.
Step-by-Step Replacement – Done in Ten Minutes
Before you begin: UNPLUG the tool from the mains or REMOVE the battery pack. This is non-negotiable.
Tools Needed: A suitable cross-head or flat-head screwdriver (often the one included with the tool works fine).
Procedure
-
Open the Caps – Locate the round or square plastic/metal covers on the sides of the motor housing (usually marked with a brush symbol). Unscrew them counterclockwise.
-
Extract the Old Brushes – Gently pull out each carbon brush. Pay close attention to:
-
The spring orientation (which side the spring sits on).
-
The installation direction (flat side vs. angled side facing the commutator).
-
First-timers often install these backwards—take a photo before removal!
-
Clean and Inspect the Commutator – With the brushes out, use a clean, dry cloth or a soft eraser to gently wipe the commutator (copper segments) surface to remove carbon dust and oxidation. If the copper surface is deeply pitted or grooved, professional service is required.
-
Replace in Pairs – Never replace just one side. Even if one brush looks serviceable, always install a matched pair. This ensures equal spring pressure and balanced current distribution.
-
Reinstall and Secure – Insert the new carbon brushes in the exact same orientation you noted. Ensure the spring firmly presses against the brush tail. Screw the caps back on securely—but do not overtighten and strip the threads.
The "Break-In" Period – Expect This
When you first power up after installing a new Carbon Brush For Power Tools, you'll likely see more sparks than usual. This is completely normal. The new brush has a flat or differently curved face that doesn't yet match the worn commutator's contour.
Allow a few minutes of running-in:
-
If your tool has variable speed, run it at medium-low speed for 3–5 minutes.
-
The sparking will gradually diminish as the brush face conforms to the commutator.
Advanced Tip: Reading the "Face" of Your Old Brushes
Here's a pro-level diagnostic trick. Don't toss those worn-out brushes immediately—their friction surface tells a story about your motor's health.
| Wear Pattern | What It Reveals | Recommended Action |
|---|---|---|
| Mirror-smooth, even surface | Perfect working condition. | Normal wear. No concerns. |
| Rough surface with fine grooves ("threading") | Insufficient spring pressure or excessive vibration. | Check and replace springs. |
| Chipped edges or pitting ("spalling") | Brush binding in the holder, or uneven commutator surface. | Clean the holder; inspect commutator. |
| Copper particles embedded in the brush face ("copper pickup") | High-temperature arcing or severe commutator wear. | Red flag – possible advanced motor issue; consider professional evaluation. |
With these diagnostic and replacement skills, your corded power tools can easily serve you for another decade. It's not just about saving money—it's about understanding your equipment, minimizing downtime, and keeping your workshop running efficiently. A properly maintained Carbon Brush For Power Tools is the difference between a frustrating day and a productive one.
Send Inquiry

X
We use cookies to offer you a better browsing experience, analyze site traffic and personalize content. By using this site, you agree to our use of cookies.
Privacy Policy